Have you ever noticed that as you grow older you start to like foods that you thought you didn’t like at all? I sure have! One vegetable that I really didn’t like in my youth has gradually become a favorite of mine. What vegetable is it? Sweet potato!
Sweet potatoes are related to the morning glory vine, and if you see some flowers on yours late in the season you will recognize the similarity. They are only distantly related to common potatoes and not at all related to true “yams.” They are believed to have originated in central or southern America and Columbus appears to have been the first to bring them to Europe (Wikipedia). By the time European colonists came to what is now the U.S., sweet potatoes were already a part of their gardening plans.
The reason I started growing them was curiousity. I had a little extra garden space, and my neighbor had some extra “slips.” Sweet potato slips are the rooted shoots from the tubers that are used to start a new crop. The CGC offers slips to gardeners during the warm season plant distribution each spring. I did some quick reading on how to plant them and stuck them in. A nice mounded trough full of sandy compost is ideal. No need for any chemicals in Mid-Missouri, plus they like hot, dry weather! By late summer, the vines had attempted to cover everything in and around the garden, including my husband’s truck! But any hassle they caused they made up for at harvest. From year to year my production has varied, but I have harvested as much as 160 pounds of tubers from four slips! Imagine getting that kind of production when there’s no grocery store to tide you through the winter. No wonder this crop has spread all over the world!
Author with her personal record 12 pound sweet potato.
There is a trick to storing all that bounty. Sweet potatoes must be “cured” before storing. Curing not only improves storage (I still have one ready to eat from 2018), but also makes them sweeter and higher in nutrients. If you doubt this, try eating one straight out of the garden, make a mental note of how sweet it is, and then compare that to a cured potato one month later. In commercial production, tubers are stored in large buildings at 85-90 degrees (F) and about 90% humidity for anywhere from 5 days to 2 weeks. Unfortunately, that’s not so easy to replicate around here in the fall.
Here’s what I do. For one thing, NEVER let frost touch your vines. Sweet potatoes are a tropical plant, and frost encourages them to quickly rot. Starting in late September, I keep a close eye on the weather forecast. What I’m watching for is a late hot spell. A day or two before it hits, we cut off all the vines (the leaves can be eaten). Then when it’s at least 80 degrees, we dig them up and let them sit all day in the shade of other garden plants. Next we gently knock off the dirt (do not wash them), and either place them in a shaded hot place outside or, if necessary, move them into the hottest room of our house, making sure they are shaded. I doubt I have ever met the humidity requirements, but like I said I still have an 11-month old sweet potato to eat, so I must be doing something right. When I feel like they’ve cured long enough, I move them down into the basement. Cured tubers keep best at about 60 degrees in the dark.
So, what’s the best way to eat a sweet potato? For me, baked and then mashed with butter, brown sugar and fresh grated ginger — I actually converted a previous sweet potato hater with that fresh ginger addition. They are also good diced and roasted with a little olive oil and salt, or made into sweet potato fries. My neighbor who started me down this road makes them into black bean and diced sweet potato quesadillas for the kids at her daycare. Apparently they love them! And since sweet potatoes are chock full of beta carotene and vitamin A, nutrients that are lacking in many American’s diets, why not give them a try?
For additional information on growing sweet potatoes here are some handy links:
Prepared by guest contributor Samuel Garrett McKee with assistance from David Neely and Margaret Rossano. Garrett is a garden leader of the Circus-Lyons Community Garden.
Cover crops have become increasingly popular in the past several years, seeing use from large-scale producers down to mid- and small-scale operations. Originating in pre-industrial times, cover crops have been an organic and sustainable, tried-and-true, method of using naturally occurring cycles to benefit soils for hundreds of years. The benefits are clearly seen once implemented, even at the community garden plot scale (10×10 ft, for example). At the Circus-Lyons Community Garden, we have been using cover crops for the past two years with solid results.
Essentially, when a garden plot would otherwise be unused, we “cover” that soil with a special crop of plants, the purpose of which is to feed the soil, rather than to feed the gardeners. Several weeks before you want to use that plot again for annual planting, the crop is cut down and the plant matter incorporated back into the soil. Fall is a great time to start implementing a cover crop at your garden. Read on for more information and detailed advice.
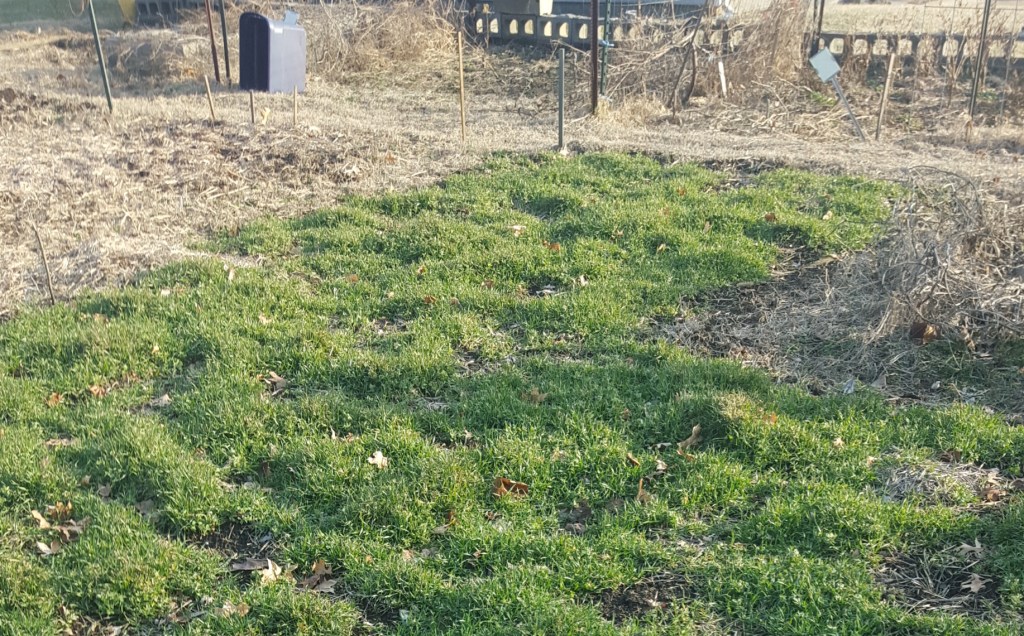
Feb. 3, 2019. Cover crop planted in late October, cereal rye, Austrian winter peas and crimson clover. Established before coldest weather hit, overwintering well even with a real winter. It’s merely waiting for longer warmer days and will likely be a foot tall by April 1.
The amount of information on cover crops can be daunting when you first begin the research, however, clarity can be found by thinking of cover-cropping as reminiscent of natural cycles. Central Missouri was once home to native tall-grass prairie ecosystems: perennial grasslands that harvest sunlight during the growing season and put the resulting carbon into plant tissue, which is in turn harvested by grazing animals or consumed by wildfire, thus promoting plant competition and further unimpeded growth and diversification. This cycle was carried on without human intervention, adding yearly inputs to the soil.
Typically, gardeners and farmers plant annual crops during a growing season, fertilize with off-site inputs, harvest, remove any residue of the crop, and then consider things finished. This leaves our soil more or less bare during the winter season, opening up invasion opportunities for weeds as well as the potential for erosion. This system is not reliably found in the natural world where there is continuousbiological activity in the soil, year-round. This is what cover crops aim to fulfill.
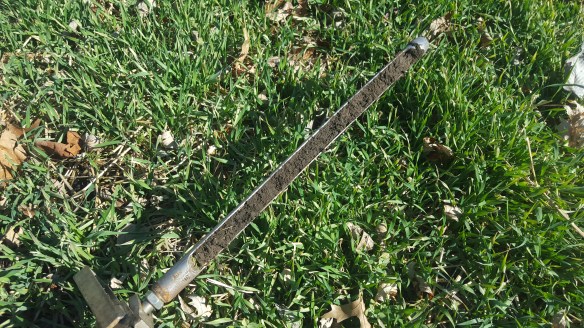
Jan. 28, 2017. Cereal rye and crimson clover cover crop with soil probe showing the color you’re looking for!
Effective cover-cropping imitates a prairie system in that it provides more overall diversity and duration of biological activity to a plot. It can also stabilize soil; armor against weedy species and erosion; improve water capture/infiltration into subsoil; and improve the soil’s physical, chemical and biological makeup. Many resources exist for guidance on the matter, however, I will speak for what has worked for us at the plot level in our community garden.
Species Selection
Species used are many and again can be daunting to the beginner. I tend to think about them in botanical terms; grasses (graminaceae), forbs (many families, but you can think of them mainly as flowers), legumes (fabaceae).
Grasses
Species include cereal rye, oats, annual ryegrass, winter wheat and sorghum.
Pros:
Grasses are competitive against weeds (including Bermuda grass!), they
establish quickly and reliably, and they can be harvested for grain,
mulch or hay, or even grazed. Grasses scavenge soil nutrients that would
otherwise leach out or be taken up by weeds. Also, they are usually
very winter hardy, easy to plant in fall and inexpensive. Species
include cereal rye, oats, annual ryegrass, winter wheat and sorghum.
Cons: Grasses can easily out-compete forbs or legumes planted alongside them, detracting from overall benefits of diverse cover crop plantings. Cereal rye, upon termination, suppresses weeds and/or seed germination allelopathically in the soil, meaning that compounds released by the rye as it is killed will stifle germination of other species for a short period. A solution to this minor issue would be to allow two to three weeks of inactivity between termination and the next planting.
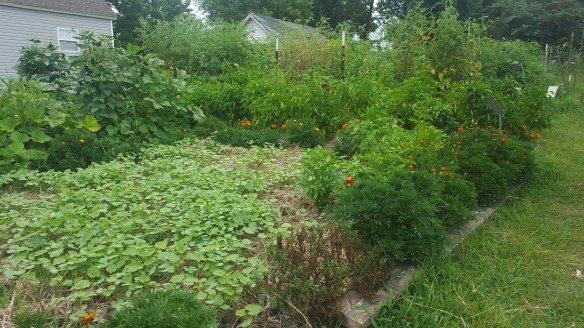
April 23, 2018. Cereal rye, crimson clover, winter wheat adjacent to hand tilled, just terminated cover crop
Forbs
Species include radishes, turnips, buckwheat, and sunflowers.
Pros: Forbs usually have deeper root systems that scavenge/capture nutrients in the topsoil that are unavailable to many crops. The, provide bloom and beauty, and some can be harvested for seeds or flowers, or they can be grazed.
Cons: They are sometimes slower growing or difficult to get established, and they sometimes cost more.
Legumes
Species include clovers, vetches, winter peas, black-eyed peas (cowpeas).
Pros: Legumes sequester nitrogen from the atmosphere and make it available to plants in the rhizosphere (rooting zone). They provide beauty and blooms for pollinators, and can be grazed or harvested for hay/mulch.
Cons: They are they usually slower to establish than grass, and the seed should be inoculated prior to planting. Red clover is a perennial and will persist when not desired, and vetches are semi-aggressive invaders into both urban and wild environments.
Fall Cover Crops
After the summer garden crops have played out and freezing temperatures are on the horizon, you should be thinking of cover cropping by October through mid-November. The trick is to get the crop established and at least 4- to 6-inches tall before the harsh temperatures set in. Species that work well at this time include Austrian winter peas, crimson clover, cereal rye, winter wheat, and oats. Doing a two to four species mixture seems to work well, as each year is different and having multiple species to fill in unexpected gaps is ideal. Cereal rye, crimson clover and winter peas have been a good combo for us at Circus-Lyon garden.
Late Winter/Early Spring Cover Crops
Similar species as work in the fall will also work from late February through March and even into early April. Snap peas could be viable for this outcome, as well, since they are a legume. We’ve even had seed sown in January warm spells that germinates in early March and grows vigorously all throughout spring.
Summer Cover Crops
After a spring crop is harvested, you can plan to seed a cover crop into an otherwise fallow plot. Species which work well for this would be buckwheat, mustard greens, annual sorghum, black eyed peas or anything which can handle heat, sunshine and long growing days. Buckwheat puts out a long taproot, bringing otherwise unavailable nutrients up into your plot’s topsoil as well as providing much-needed blooms for pollinators. However, if left to go to seed, buckwheat will seed your plot in many little individuals that will compete with desired crops when given the opportunity! Cowpeas (or Black-eyed peas) are a great legume choice for summer.
Aug. 5, 2017 Buckwheat establishment following sweet corn.
Terminating Your Cover Crop
Cover crops must be “terminated” once the time rolls around for planting of desired food crops. Many ways exist to do this, but I will detail the way which has worked for us. First we mow or weed-eat the cover crop about two to three weeks prior to our desired planting date. We let the residue of the cover crop sit for several days after mowing, then turn it by hand into the soil using a shovel or a tiller. Small plots are best done by hand. Be sure to break up the clods and root systems while turning it over, and try to get dead plant matter buried. This provides food for earthworms and countless other micro biota in the soil to consume and make available for your soon-to-follow food crops. Some warmer season cover crops, such as oats or buckwheat, will self-terminate, or winterkill, when exposed to cold temperatures. This is also a convenient time to incorporate compost into the soil to feed the incoming crop.
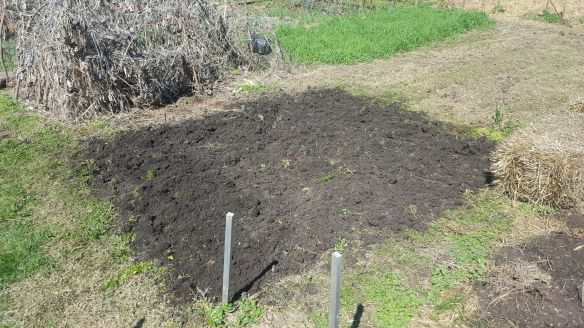
March 30, 2018. Mowed cover crop adjacent to mowed, then tilled cover crop.
Optionally, legumes and forbs can be allowed to flower before you terminate them, which provides blooms for native pollinators and honey bees (crimson clover is worth growing for the flower alone!). Buckwheat seed can be harvested easily enough by hand and used the following year, or ground into gluten-free flower. Cowpeas and snap peas can be harvested for consumption.
A good cover crop is a species that “behaves” in an agricultural setting, meaning it doesn’t escape or become invasive, is an annual, doesn’t persist after termination, and is consistent in establishing and flowering like any other crop. A cover crop’s ability to suppress weeds is perhaps its most powerful feature, as the ideal period after termination to planting is a very short window, excluding many undesirable weed species otherwise abundant in our community gardens.
Summary
In summary, cover crops provide a suite of benefits to your garden plot including improving soil structure, fertility, water holding capacity and overall diversity; weed suppression; carbon sequestration; soil conservation; and supporting earthworms, pollinators and wildlife habitat. We have ordered cover crop seed through Wilson’s Garden Center or picked up larger custom amounts from Bourn Feed and Supply Inc., both located here in Columbia.
Another wonderful benefit you will notice immediately is the aesthetic beauty the verdant, lush cover crops provide during otherwise dreary times of year. As the great conservationist Aldo Leopold once wrote,
“A thing is right when it tends to preserve the integrity, stability, and beauty of the biotic community. It is wrong when it tends otherwise.”
Cover crops can help community gardeners accomplish this simple yet powerful truth.